
eLearning EnCap
eLearning EnCap (iOS)
To create an iOS application with eLearning EnCap you will need the EnCap framework for iOS and your created HTML course as a SCORM package.
Install CocoaPods
If you haven’t installed already CocoaPods it is required to do this first. If you already have done this, you can continue with the next step. Open the application Terminal and install CocoaPods with the command:
$ sudo gem install -n /usr/local/bin cocoapods
This has to be executed only once and isn’t necessary for further projects.
Preparation of the working directory
Unpack the content of the framework archive to a directory of your own choice.
Install Pods in the working directory
Open the application Terminal and change with the command
$ cd <Encap Directory>/App
to the App folder inside the working. Than install the Pods required for your project with the command:
$ pod install
Open Project/Workspace
Open the project afterwards with XCode, i.E. with a double click on the file App.xcworkspace in the App directory of the unpacked archive.
Add courses
Copy the files of your HTML course into a directory inside the folder App/public/assets. This can be done with the finder or directly in XCode. If you have created the HTML course as a SCORM Zip archive for a LMS, unpack the file into that directory.
The already integrated course in the Demo directory can be deleted. Temporary it can be used to test the development process.
Adapt configuration
Open the file courses.json in the directory App/public/assets and adapt the entries here. It is important to change the uuid entry to avoid overlaps. This is especially important for the enterprise version, to differ courses within the platform. A new uuid can be created easily with the Terminal. Open the terminal and call „uuidgen“.
$ uuidgen
Nach Bestätigung der Eingabe wird eine neue eindeutige UUID ausgegeben, diese kopieren Sie einfach in den Eintrag der courses.json Datei.
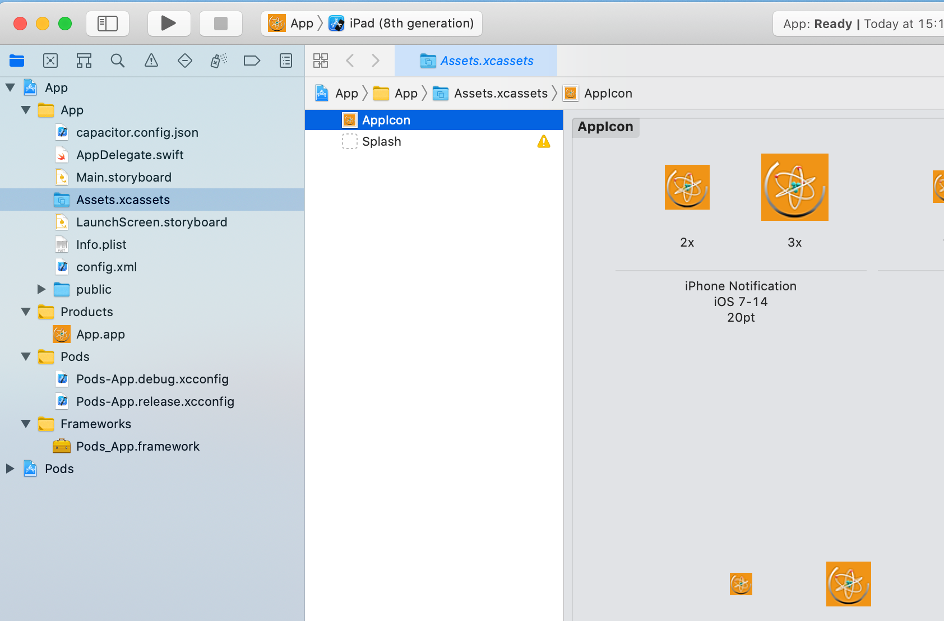
Change App-Icon
The application icon for App is inside the directory Assets.xcassets. You can change the contents directly in XCode. Select the file in the projects navigator in XCode and change the symbols inside by simple drag-and-drop of your own symbols.
Change application name
To change the name of the application, select the main entry in the project tree and change the application name by renaming the entry below the „Targets“ section.
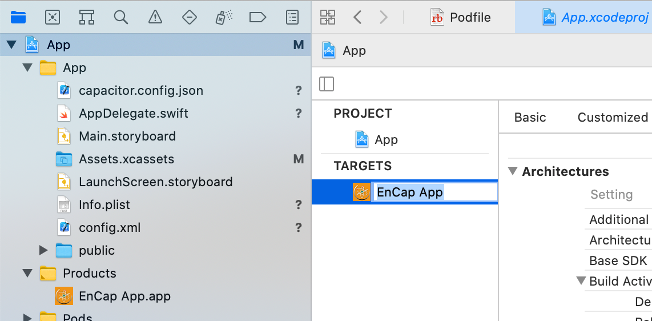
After renaming the entry you have to change also the file Podfile in the Pods directory accordingly, also you have to adapt the project data within the corresponding fields to your own organization/project.
Adaption to your own Design
The adaption of the info dialog and your own logo image is done by replacing or editing the files about.css, about.html and info.png in the directory App/public/assets. The image size should be kept to the size of the provided origin. The requirements to the information in the about.html depend to your own responsibility to fulfill the required laws and rules.
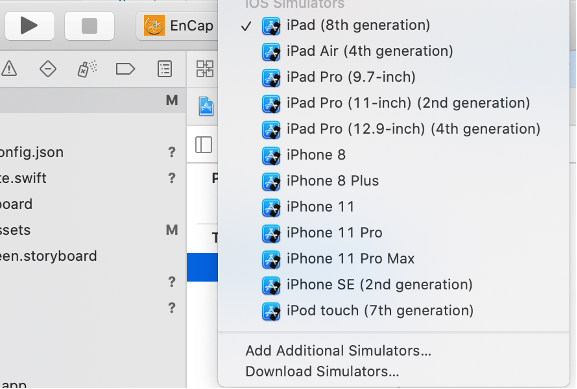
Test and create the application
The application will be created with the XCode functions. You will find detailed information in the XCode documentation. In simple cases, select a physical device or a simulator and start the application by pressing the “Play” button. The application will be compiled and will be started in the corresponding environment, after completing the build process.
eLearning EnCap Manual (iOS)
Date published: 6.10.2020 (v1.0)
Copyright © SEB Software Entwicklung & Beratung e.K.
All Rights Reserved.
No part of the software or the description may be copied in Form (Print, Copy, Micro fiche or any other form) without the written permission or process, reproduced or distributed by using any electronic or digital system. The violation of the copyright Is liable to prosecution.
All products mentioned in this documentation or technologies are registered trademarks or trademarks of the corresponding distributor.